
This section shows you how to assign a target language to a 'Translation' workflow.
The following content is an excerpt of a workshop. To see this lesson in context, please refer to "Workshop 2: How to create a Translation Job Workflow (Step 9)".
NOTE:
A detailed description of any window used here can be found in the 'User Interface Description' sections.
Let's get started!
Assign target language
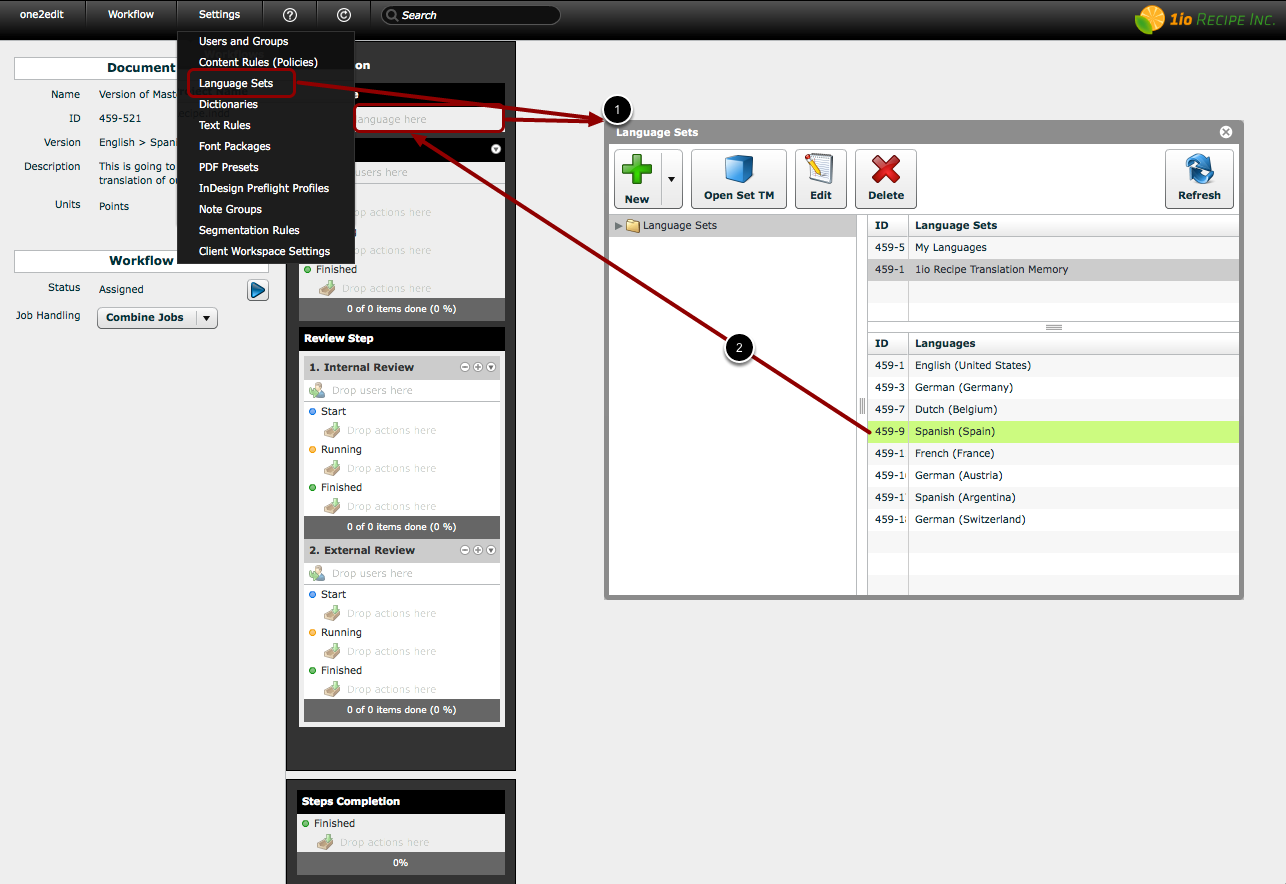
In a translation workflow track, you first need to assign a target language. This is the language into which the original (source) text will be translated.
- Open the 'Language Sets' window by either double-clicking the "Drop language here" slot or clicking 'Settings > Language Sets'.
- Drag and drop your target language into the 'Language' slot of your workflow track. You can only assign one target language per workflow track.
NOTE:
This step is similar to when you assigned a language to your content group, but there is a very important difference:
- The language that is assigned to a content group is the source language, i.e., the language in which the master document is written.
- The language that is assigned to a workflow track is the target language, i.e., the language into which the version document will be translated.
NOTE:
Every 'Language Set' has a separate translation memory. If there is more than one 'Language Set' available, you should be careful to select the language from the set with the correct translation memory for this project.